
Accepting Credit Card Payments and ACH from your clients just got way easier!
You’ll no longer need to leave your CRM in order to process a transaction in a third-party system, and then come back to the CRM to make a note of it.
Instead, you can now charge your clients right from the comfort of your CRM!
Simply enter the client’s credit card or ACH information on the lead and submit the transaction!
Once the transaction is submitted a new payment profile will be automatically created in the CRM, and you can re-use the profile to submit new transactions in the future.
Your client’s credit card or ACH information is saved securely in the payment gateway, while the CRM stores only the payment profiles. You can create as many profiles for your clients as needed.
The new payment acceptance feature even allows you to set up recurring billing! Simply select a payment profile, toggle the recurring billing switch, and set your billing frequency.
The system will then automatically start charging your client in the selected time intervals.
All transactions can be easily tracked using the accompanying transaction reports which also provide the ability to cancel transactions or issue refunds.
Let’s see how you can get started with the new feature right away, and streamline all of your transactional processing into the CRM Dialer!
Setting Up Payment Acceptance
Before you get started with the payment acceptance in your CRM you’ll first need to take care of a few administrative tasks.
In order to enable Credit Card Payments on your site, your administrator will need to enable the Authorize.Net Integration in your CRM.
Similarly, to enable the ACH Payments the Paya ACH Integration will have to be enabled.
For more information on enabling these integrations please see our Authorize.Net Integration Guide and the Paya ACH Integration Guide.
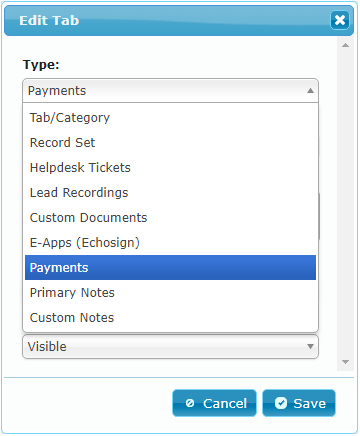
Once the integrations are enabled, the Payments tab can be added to your lead from the Manage Lead Fields page:
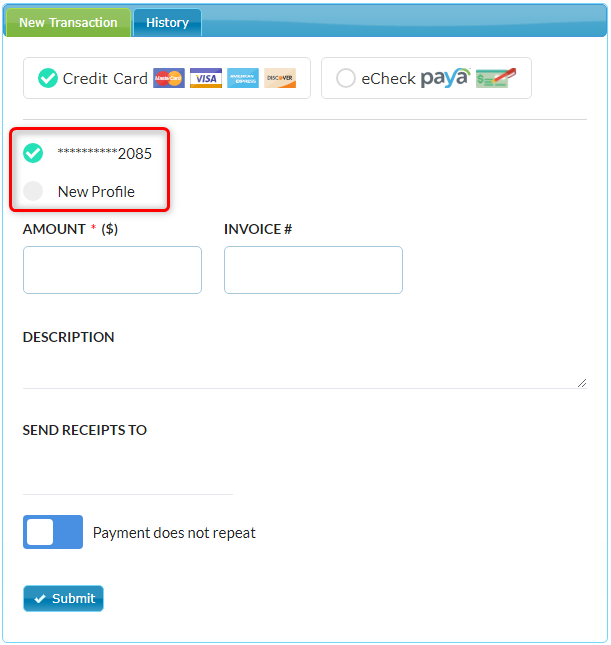
Here is a screenshot of the Payments tab with the accompanying New Transaction and History sections:

The last step in your setup is to edit the user class permissions and allow users in selected users classes to access and use the payment features:

Submitting Transactions
With the admin stuff out of the way, you’re now ready to submit your first credit card transaction!
Select the Credit Card option on the New Transaction tab, fill in the transaction details, and submit the transaction.
Here is a short demo:
After a transaction is successfully processed, a new profile will be automatically created which you can then select the next time you need to charge the client.
You can also add additional profiles using the New Profile option:
A similar procedure is followed when making an ACH transaction, except that ACH transactions can be both payments and collections:
After you submit your ACH transaction the new payment profile will be added to the client which you can then re-use in future transactions:

For more information on the lead payment features please see our Collecting Customer Payments guide.
Setting Up Recurring Billing
The recurring billing automation you can save a lot of time for your sales reps and ensure that you receive payments on-time every time.
Your CRM makes enables you to set up recurring billing in just a few super-easy steps! Here’s how:
![]()

When a new transaction is added based on the recurring billing schedule, it will automatically appear in the transaction history as a new transaction.
Transaction History
With the new payment features, you will of course also need a robust transaction reporting capability and your CRM provides you with just that!
What’s more, the transaction reports also allow you to cancel transactions or issue refunds with just a couple of clicks!
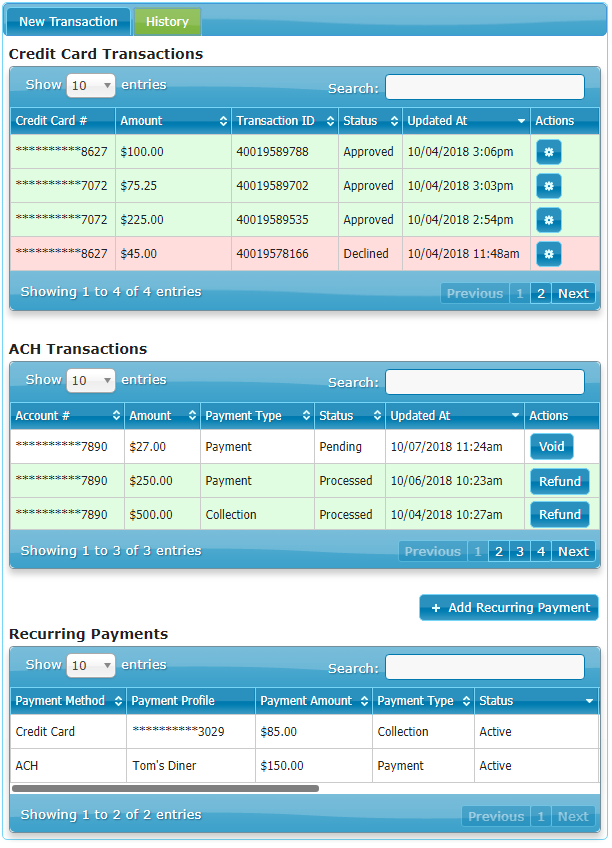
To view your transaction reports, open the History tab which shows three transaction reports—the Credit Card Transactions, ACH Transactions, and Recurring Billing:
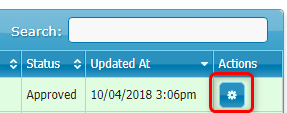
To see more information on a transaction in the Credit Card Transactions report, click on the gear icon in the Actions column:
The Transaction Details popup will then open as shown in this example:
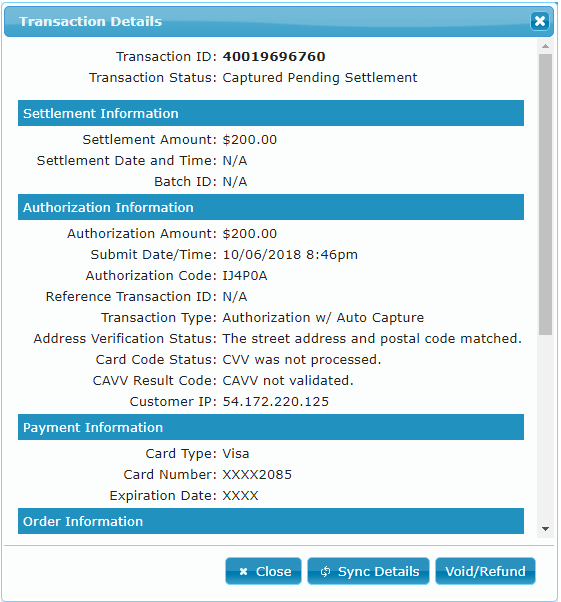
At the bottom of the Transaction Details popup you’ll find the Sync Details and the Void/Refund buttons:

Use the Sync Details button is to refresh the transaction data manually (by pulling a live update from your gateway).
The Void/Refund button allows you to cancel an unsettled transaction, or issue a refund for a settled transaction.
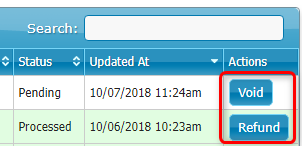
You can also cancel ACH transactions or issue refunds by clicking on the Void or Refund buttons in the ACH Transactions report:
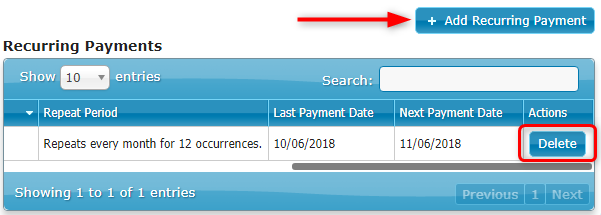
The Recurring Payments report allows you to add new recurring payments or to delete existing ones:
And that’s it for our updates today! We hope you enjoy using the new features and that they will contribute to growing your business!
For more information on CRMDialer’s robust customer and lead management software, or on any of the platform’s built-in sales and productivity features. You can schedule a free demonstration, reach out to our team, or, better yet, start your free trial today!
Category:
CRMDialer Blog
Featured Functionality